I’ve been a long time lurking and recently felt the need to document my workflow for both myself and others. If someone has suggestions that can improve the output feel free to comment!
Up until now, I’ve used the Android app mounted on the auto windshield (windscreen for you Brits ![]() ) to capture and upload images to Mapillary. Recently though, I’ve moved to Pune, India and there are some unique challenges to mapping. I won’t go through them all but I changed my capturing technique to using a GoPro mounted on a chest harness and walking through the side roads and alleys.
) to capture and upload images to Mapillary. Recently though, I’ve moved to Pune, India and there are some unique challenges to mapping. I won’t go through them all but I changed my capturing technique to using a GoPro mounted on a chest harness and walking through the side roads and alleys.
GoPro Setup
First, I’m using the GoPro7 Black with “Time Lapse Photo” taking a picture once every 5 seconds.

I read a posting somewhere where the author was taking a picture once every 2 seconds but that seems too dense to me so I set it up once every 5 secs. I even considered taking a picture once every 10 secs, but there is really no advantage since I’ve got plenty of space on the memory card.
After taking my time lapse images I import them onto the computer. From here I delete any “bad” photos; blocked shots, blurry, pointing weird direction, etc. There are usually a couple but not many.
How Accurate is the GoPro7 GPS?
I have record gpx traces in the past using the OsmAnd smartphone app and have been using it more recently in Offline mode as I walk around in India. So I wondered which is more accurate, the smartphone GPS or the GoPro7 GPS. Note that I am using a Samsung S8+, not sure if that makes a big deal or not. So I recorded a TIme Lapse Photo series on the GoPro and recorded a gpx trace on the phone at the same time then compared them visially in GPSVisualizer.
First off, how do you get a gpx trace of a bunch of photos? This is done pretty easily in a piece of software called GeoSetter. It’s a pretty awesome software that uses the famous exiftools so you don’t need to dork around with command line stuff. Just load the folder of photos, highlight them all (Ctrl-A), select File>Export to GPX Track File…, choose a name and location.
What this does is reads the lat/long coordinates that was written to the photo EXIF tags by GoPro. Now you have a gps trace file where the coordinates are every photo you took. But is this more accurate than the phone?
I exported the gpx file from the OsmAnd app to the computer and I’m ready to view them both. Ideally, the two traces should be identical. Here’s an example of my results:

Wow! Wtf is going on with the phone GPS?? Did I do something wrong? Well, I tried it a couple more times and even used a different phone app but the results were the same. I don’t know if my experiment was flawed in any way or if my situation was unique. All I can say is the GoPro GPS was more accurate than my phone. The phone wandered all over the place. Your results may vary but this is what I found in my situation.
Cleaning up the GPS Trace
Now that I have confidence in the GoPro gps and prefer it over my phone, I’m going to smooth the trace a little. I really don’t think this is a big deal and probably not worth it, but I tend to be a bit obsessive. What I do is import the file into GPSVisualizer and apply a smoothing filer by adjusting the trackpoint distance threshold. What is does is smooth out the trace and removes any sharp zig-zags. Here is a before and after:

In this example, the red trace is the original GoPro gps trace that I pulled from the phone EXIF data. The blue line is the filtered trace. If you assume the photos are located at the point where the trace changes direction, I call this the kink point :), then smoothing the trace reduces the amount of directional change. I just think this makes sense because I’m walking and have limited directional change. I’m not going to be on one side of the road 1 photo and then far on the other side of the road 5secs later for the next photo. I try to be very consistent when walking, so I know this is noise.
I’d appreciate anyone’s opinion on this matter. Please tell me if I’m crazy because this is based on nothing by hunches.
I almost forgot, how do you create this smoothed gps trace? Go into GPSVisualizer to “Convert a GPS file to plain text or GPX” and select the GoPro gpx file. This is the one we created from GeoSetter. Next click on “Show Advanced Option” near the bottom. I insert the value 20 into the “Trackpoint distance threshold:”. I have no reason other than I played with it a bunch and this seems to output the best results. Finally press the “Convert” button and save it with a reasonable name somewhere.
So now that I have a smooth trace, I need to map the photos back to this trace. For this I go back to GeoSetter. I takes the time stamps of the gps points and the photos and matches them. For this case (I should double check), but since the original gps point were pulled from the photos they should be identical (1-to-1). Regardless, if not the program does a fanatastic job of interpolating and matching the best it can.
This process is nearly identical to the reverse geotagging we did earlier. Load the folder of photos if you don’t already have them still loaded, highlight them all (Ctrl-A), select Edit>Synchoronize with GPS Data Files…
An option window comes up and I enter the smoothed file in the “Synchronize with Data File:” option. I haven’t figured out why yet, but in one of the previous steps the timezone is getting stripped out or something, because at this step the times in the processed gps trace no linger include the timezone offset. You did remember to set the timezone from the phone app, right?? I’ll figure it out and update this post, but in the meantime you need to adjust the UTC offset. My current time zone is +5:30UTC so here are my values.

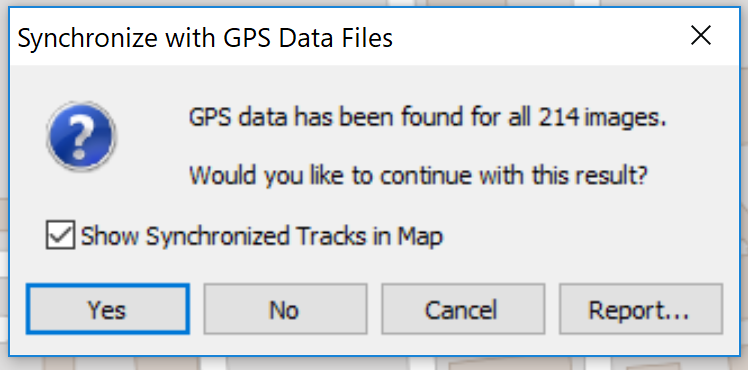
If everything works you will see a confirmation window.
Uploading to Mapillary
Now that the gps coordinates have been manipulated it’s time to send the photos to Mapillary. I am a bit geeky and have played around with the Command Line tools, but the easiest for me is to just use the [Desktop Uploader0(https://www.mapillary.com/desktop-uploader). Maybe in the future if I automate all of this workflow I might use something different, but for now it seems to be the easiest. I wont’ explain how to use the Desktop Uploader because it is pretty simple and there are already tutorials out there.
Uploading Trace to OpenStreetMaps
Being in India the roads are not always mapped correctly and having as many traces as possible improves the mapping. Or at least allows someone to improve the mapping ![]() So I upload my smoothed traces as indentifiable to OSM
So I upload my smoothed traces as indentifiable to OSM
EDIT 2019-07-09:
I’ve couldn’t stop thinking about this post and have gone down the rabbit hole a bit.
Smartphone capabilities
As suggested by filipc, many phones use the Galileo satellites. I verified on their website www.usegalileo.eu confirmed that my phone (Samsung S8+) is compatible to use the Galileo GNSS. It doesn’t use dual frequency, but then again, very few smartphones do.
Why do we care? The EU Galileo satellites provide consumers (in general) with better accuracy than the US GPS satellites.
But then I found a teardown posting of the GoPro Hero7 Black and apparently their chipset is pretty decent, it can use Galileo as well as 3 GNSS concurrently.
Source: Gopro HERO7 Teardown – HYPOXIC
So why am I seeing a difference?
If the GoPro and my mobile both have about the same capability why am I seeing different results from the two? I found an published academic paper that basically proves dual frequency > single frequency receivers (this we know) but then makes some experimental claims that single freq standalone receivers are more accurate than smartphone single freq receivers. They rationalize this via signal-to-noise is lower on smartphone due to pcb placement, rf interference, antenna placement/design, etc. But it wasn’t incredible different.
What if they are post-processed differently? It seems true that there is some post-processing of these lat/long positions…Google has options to use wifi and bluetooth to “improve accuracy”. I’m not a software developer but perhaps there is some heuristics that are applied.
Mistake in my experimentation?
This whole post is to say…I think my experiment methodology/settings may have affected the outcome. In the mobile app there is a setting for how often to collect GPS.

In my mind, since I was capturing an image on the GoPro every 5secs, keeping a track with points every 3 secs was sufficient. Now I think that this may be effecting the accuracy. I had assumed that it was staying “awake” and tracking constantl, but only saving a value every 3 secs. Now I think that it goes to “sleep” (or whatever the technical process is) and has to reacquire every time, or least something like this. This is based on seeing a comment (somewhere on the app) that increasing the interval will use less battery consumption.
To test this I did another trace with the logging interval set to maximum. I don’t know how to qualitatively measure the results, but it “looks” pretty good.

Expected Results
According to this accuracy function on the GPSTest Android App my accuracy (on this particular day and location) was about 7.3 meters, meaning the mobile thought I was 7.3m from my actual position.

According to the all-knowing interwebs, we should expect a best-case accuracy of the US GPS of around 5 meter accuracy. Knowing that I’m in an area with 21 story buildings around, that seems pretty reasonable.
Conclusion
This was fun. A bit obsessive and over the top, but if you are geeky enough to be reading a forum like this then you are probably interested in these things.
-
If you are using a smartphone app to record tracks and accuracy is desired, don’t use large logging intervals.
-
The GoPro Hero7 Black contains a GPS that is just as good as your current smartphone. I don’t think there is any improvement in tracking your image locations with a separate device unless/until you are using a dual-frequency Galileo capable smartphone or stand-alone receiver.
Future Investigations
- My phone was capable of using Galileo satellites but it was not. It was only picking up US GPS and the Russian GLONASS.
Again I’m wondering, is this conclusion incorrect or am I doing something wrong? I’m currently in India so is there anything weird about that making this different? So I’m going to keep investigating these questions. - India has recently launched their own satellite network called IRNSS that is not a global network but a regional network covering India.. From what I read it is operational as of mid/late 2018 and is supposed to have higher accuracy then Galileo. This is achieved with both dual frequency, one being a low freq that will not be affected by the ionosphere, and also being in higher orbit. The last is supposed to help with shooting straighter down in-between tall buildings.


